Sunday, 24 November 2019

Crafternoon Tea at Daisy Doodle Paint a Pot Parlour, Northallerton

As you can tell, I've rebranded my blog. Gingerbread Smiles started in 2013 when I was 21 and a lot has changed since then, so I think it's time to have a more grown-up name. I'll definitely miss my old name, but we're starting fresh with This Northerner. I wanted to ensure my name had some relation to where I live, and this seemed to fit the bill. Now we've addressed that, on with today's post.

Daisy Doodle Paint a Pot Parlour is a quaint store/workshop located in the small market town of Northallerton, about half an hour from me. Here you can paint all sorts of different ceramic 'pots' however you'd like and the staff will get this fired up for you so you can keep your creation forever. The store is filled with lots of different options at different price points so there is something for everyone to get involved with.

As someone who loves a craft, we visited last month for Daisy Doodle's first 'crafternoon tea' which involved painting your 'pot' whilst enjoying a lovely afternoon tea. Two of my favourite things mashed together, how could an afternoon get any better? We enjoyed it so much that we went back for a second time.


When we arrived at around 2pm on a Sunday afternoon, it was very busy but luckily our table was secure, so we scoured the room for our next pot to paint whilst we eagerly awaited our afternoon tea. I decided on a pen pot to use on my desk at work, whilst Mum chose a milk jug to accompany the teapot and sugar bowl she painted last time. Unless you have a specific vision going into this kind of thing, it is a struggle to first pick what you are going to paint, and then how you are going to paint it. I had a little Google for inspiration and finally decided on the tried and tested galaxy effect.

We picked our colours and got to work painting our chosen pots whilst being supplied with copious cups of tea, and before long it was time to tuck into our afternoon tea. We had a selection of mini sandwiches including Coronation chicken, ham and chutney, and cheese and chutney along with a cheese scone and fruit scone each and a selection of treats. These included a sponge cake with jam, a mince pie and a meringue sandwich with a cream centre. Per person, Daisy Doodle charges £10 for this fantastic feast which you pay as your deposit to secure your place. The only additional cost when you arrive is the cost of the pot you chose to paint.


As with the last afternoon tea we had here, it was all delicious. Made by the owner's mother, who is a fantastic cook, she bakes and makes everything herself. Mum especially loves her Coronation Chicken recipe, so was happy these were on the platter once again. Even though I'm not much of a meringue fan, I do love these little sandwiches, they're so light and chewy. My other favourite was the fruit scone, a great texture which didn't break when we applied our toppings, but wasn't a rock either.

Once polishing off what we could, we wrapped the remainder ready to tuck into later at home. We then finished off our pots ready for them to be set aside to finish up in the kiln. This, unfortunately, isn't done straight away but is usually done within a week of your visit. They just ask you to leave a name and number and they will contact you when it's ready to collect.

I can't wait to see what mine turns out like and I'm sure I'll post it on Instagram when I finally get it back. If you are interested in going along to Daisy Doodle for one of their crafternoon teas or just to simply paint a pot, check out their facebook page. The people who work there are great and super friendly.
SHARE:

Wednesday, 15 August 2018

Getting crafty at the Make and Mend Festival

I've always thought of myself as quite a creative person; trying to find the best solution to a problem or making something look pretty. Although I wasn't really into crafts when I was younger, as I've grown up and got my own space, I'm always keen to do a bit of D.I.Y. Last month, I was invited to go along to the first-ever Make and Mend Festival, set up by two lovely ladies with a passion for creativity and mindfulness.

Held at Preston Hall Museum, the event brought together craft lovers from across the Tees Valley to take part in a number of workshops where we created some gorgeous and hand-crafted goodies. We were down on the morning to take advantage of the three different workshops we'd been booked on to. First up was glass engraving held in a classroom down the Victorian Street.

Make and Mend Festival Preston Park Hall Museum Craft Teesside Stockton
Make and Mend Festival Preston Park Hall Museum Craft Teesside Stockton Glass Etching

Led by Bloom in Art, the class allowed each participant to make either a pendant or a key ring. We each had to think of something that meant a lot to us, or that we want to be reminded of on a daily basis. I chose to etch 'Explore', as I love to travel and I want to do it a lot more. The process involved adding sticker stencils to you piece of glass, covering it in an acid paste and leaving it for around 15 minutes until the glass around your stencil had gone cloudy and your words remain clear and smooth. Once the acid was washed off, it revealed your design and we followed this up by drilling out a hole to then attach to our chosen fixing.

It was a very creative class which involved mediums I'd never used and methods I had never done. Although it was great to create my keyring, I don't think I'll be breaking in glass etching anytime soon. 

After this, we had some lunch from The Sitting Room in Guisborough's pop-up stall. They offered a number of gorgeous salads to be accompanied by meat or halloumi. I chose the tabbouleh with bulgar wheat, tomato, onion, parsley and mint, and the spicy tomato, onion and chickpea salad with a side of grilled halloumi and a dollop of mint yoghurt. It was so delicious and filling. I followed this up with a cheeky brownie but I ate this too quick to snap a picture.

Make and Mend Festival Preston Park Hall Museum Craft Teesside Stockton The Sitting Room Guisborough

After our lunch, we had a little bit of time before our next session which we used to wander around and have a nosy at what everyone else was doing. A few of the classes we spotted were brush lettering, floral painting and papercutting which all looked very interesting. Our second class of the day was embroidery which was led by Make and Mend's own Rachel. We all had the chance to embroider our own hoop which was pre-marked out with the words 'choose happy'. Rooting through Rachel's box of threads, all of our hoops came out very different due to the varied colours we chose. As I'd already done a bit of embroidery, this was familiar to me but it was great to be able to do more and practise the stitches I'd already learnt.

Make and Mend Festival Preston Park Hall Museum Craft Teesside Stockton Embroidery

The final class of the day took place in the conservatory which was unfortunately like a sauna as it was an extremely hot day. Nevertheless, we got stuck into making terrariums with Hoes & Ditches. As I'm not very green-fingered, it was great to have the chance to put together my terrarium adding stones, soil, picking the plants I wanted and then adding the finishing touches with pebbles and moss. I was really proud of my final effort which wasn't as hard to put together as I first thought.

Make and Mend Festival Preston Park Hall Museum Craft Teesside Stockton terrarium

I was extremely pleased to have been invited along to Make and Mend festival to try out all the exciting classes. There was a great turnout of advanced crafters and beginners, all wanting to learn new skills. Holding this in Preston Hall Museum was a fantastic idea and the venue worked wonderfully for what they needed. This was the first event that Make and Mend had run, and I'm hopeful they will organise others so I can try more crafts. If you want to keep up to date with Make and Mend, see if they decide to run further events or purchase one of their craft kits, follow them on Facebook or keep an eye on their website.
SHARE:

Sunday, 7 August 2016

Baby's first word

For a while now, people have been commenting on how crafty they think I am. How I always seem to be making something, which I guess I am. Finding new craft ideas to undertake is great as it keeps be busy and I have a beautiful output. 

For a while, I've been working on a little project for my sister's baby. She is currently pregnant but not far off now. She knows she is having a boy and is going to call him Noah. With that in mind, whilst in Hobbycraft, I picked up these 3D mache letters as well as few bits to decorate them with including coloured tissue paper, pom poms, glitter, blue paint and a sparkly paint.

I got to work as soon as I brought them home, to Matt's dismay I did all this on the carpet although I must add I had lots of plastic bags down!

3d Mache letter decoration baby room craft idea

3d Mache letter decoration baby room craft idea

3d Mache letter decoration baby room craft idea

The tissue paper N was an easy one to do, I just had to make sure I had a mix of the two colours and went over this twice to ensure good coverage. The H was just simply painted in the sparkly paint. I had to do a few coats to ensure you couldn't see the colour from below.

I painted the O and A in the blue paint to give them both a base to their decoration. With the pom pom A, I used a mix of large pom poms and smaller ones which I think gave it a really good effect! It seemed to be everyone's favourite decorated letter.

The O took the longest of them all. Glueing the glitter to the O and ensuring it was all coated was very tedious. It took a few weeks but I think it has come out okay.

The finished letters were taken to the baby shower and put on display for everyone to see. Kelly didn't know I'd done them so it was nice to finally give them to her to take pride of place in Noah's nursery.

Have you done anything crafty lately? Let me know in the comments!
SaveSave
SHARE:

Sunday, 6 March 2016

Easter Tie Dye Pretzel Bark Recipe

I'm back to my crafty ways, this time with an easy peasy treat recipe to satisfy your sweet tooth over Easter. Because obviously, you won't already be eating enough chocolate... As you know I really got into crafts and 'baking' last year when I took it upon myself to try out some ideas for Halloween and Christmas. Now Easter is upon us and I've decided to bring you some crafty ideas which I hope you'll all like to try and share.

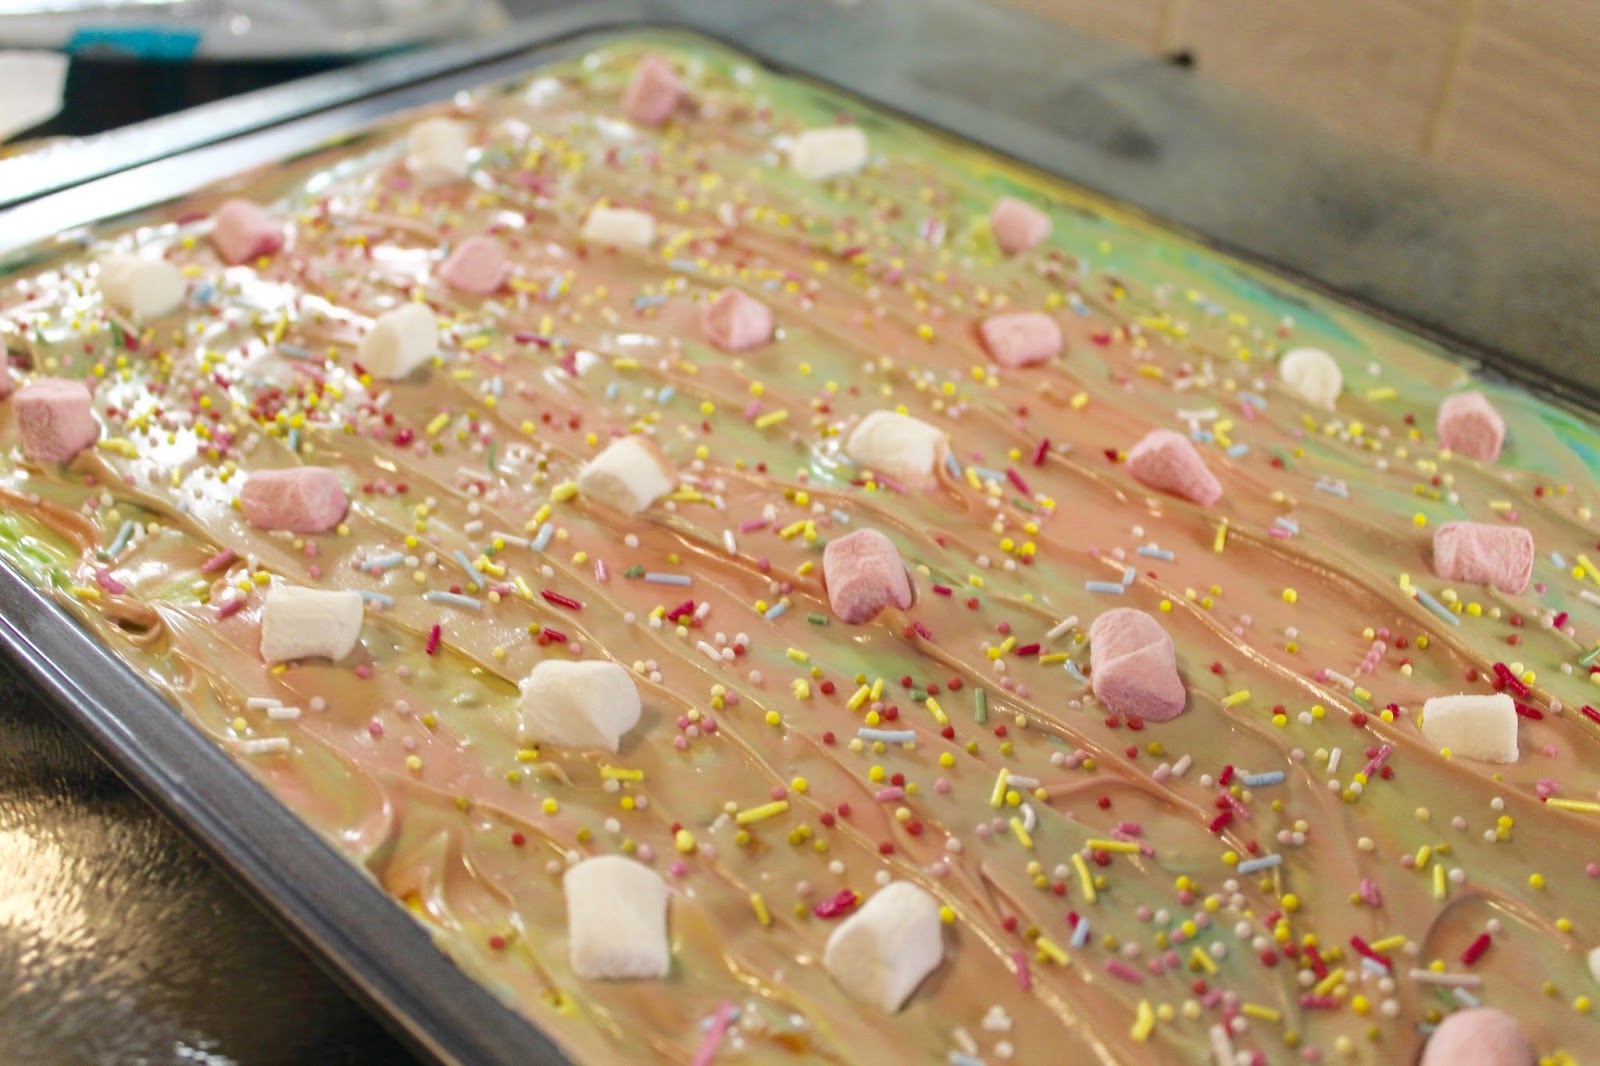
First up is a sweetie bark made with Candy Melts, pretzels, sprinkles and marshmallows. I'm not sure if you've all seen 'bark' before, but it's just a sheet of Candy Melts (which are basically coloured white chocolate) sprinkled with all sorts of goodies. The colours that I've used for this make it perfect for an Easter treat to keep for yourself or give to your friends.

I will say that when I made this it didn't work the way I thought it was going to as the Candy Melts didn't melt as I anticipated. Instead of telling you what I did, I'll tell you what you should do...i.e what I did after to correct it.

Easy Easter Tie Dye Pretzel Bark Recipe

Easy Easter Tie Dye Pretzel Bark Recipe

Easy Easter Tie Dye Pretzel Bark Recipe

Easy Easter Tie Dye Pretzel Bark Recipe

Easy Easter Tie Dye Pretzel Bark Recipe

Easy Easter Tie Dye Pretzel Bark Recipe

You will need:
- A shallow baking tray (deep enough to make a layer of your bark)
- Three packets of Candy Melts (I've used blue, yellow and pink)
- 50g salted pretzels
- Two different types of sprinkles
- Mini marshmallows
- Microwaveable jug/container
- Palette knife spatula
- Airtight container to keep it in when you've made it

Start by breaking up your pretzels and laying them out over the baking tray. You can make these really small or leave them quite big, this is all up to personal preference. Then melt a whole packet of one colour of your Candy Melts, I used yellow for the base. Use the packet instructions to melt and make sure it's nice and smooth before you start to pour it on the baking tray over your pretzels.

I'll just warn you, this won't go smoothly! They don't seem to melt as much as chocolate does so you'll just have to start spreading this across the baking tray with the palette knife. Whilst you are spreading this, melt half a pack of another colour. Dollop this onto your baking tray in different areas and spread this around. Repeat with the last colour until you have filled the baking tray and spread around in a tie-dye pattern.

Once this is complete you can decorate. Take your sprinkles and shake them across the whole tray, then add your marshmallows in whatever placement you like. Make sure you have a shelf clear in the fridge as when you've finished decorating this needs to go in for around 2 hours.

When it's completely set you can lift it out of the tray and break it into chunks. I just got hold of it and started to snap it. It's quite a sickly treat so after I took my photos I've broken it up into smaller bits.

Easy Easter Tie Dye Pretzel Bark Recipe

Easy Easter Tie Dye Pretzel Bark Recipe

This has been a hit with everyone that's tried it so far! 

What do you think? Is this something you'll be making as an Easter treat? I'd love to see any variations you try!
SHARE:

Monday, 14 December 2015

Homemade Lavender Sugar Body Scrub

This Christmas I've really been enjoying making homemade gifts for people. I've already posted about the personalised mugs and hot chocolate blocks I made and to add to these I've got a homemade sugar body scrub recipe. Inspired by Stephanie's blog about body scrubs, I've made this lovely lavender body scrub to give to my friends and family.

Homemade Lavender Sugar Body Scrub

Homemade Lavender Sugar Body Scrub

Homemade Lavender Sugar Body Scrub


Homemade Lavender Sugar Body Scrub

Homemade Lavender Sugar Body Scrub

To make this scrub is super easy and requires little ingredients:

- 20 drops of lavender essential oil
- 1/3 cup of almond oil
- 1 cup of sugar

Other items:
- Glass jars with seals
- Wooden spoon
- Mixing bowl (Make sure you use a fresh bowl and spoon that you won't be using again for food.)

First, put your cup of sugar into your mixing bowl. Add the 20 drops of essential oil and mix thoroughly. When you are satisfied this is mixed well, add the almond oil a bit at a time giving it a really good mix. When your scrub reaches the consistency of moist sand it is done. 

I then scooped this into my jars, sealed them off and decorated with a strand of Christmas string and a label letting my friends/family know what ingredients are in the scrub, how long it should last, that they should mix it before use and also do a patch test first to ensure no irritation.

Homemade Lavender Sugar Body Scrub

Homemade Lavender Sugar Body Scrub

If you are keen to make a homemade scrub but don't fancy the lavender sugar one, I recommend you check out Stephanie's site as she has different varieties using different ingredients and has lots of information on essential oils. Make sure to read up on the essential oils before trying out your own!

What do you think? Would you make this?
SHARE:

Friday, 4 December 2015

Christmas Homemade Personalised Mug and Hot Chocolate Gift Idea

If you saw Wednesday and Thursday's posts, you'll know what is coming. This is the amalgamation of the two items created in these posts, the personalised mug and the little hot chocolate blocks. It was so much fun to make both of these gifts and they'd be amazing to give to anyone as individual bits. We decided that we wanted to pair them together and make a song and dance about our little homemade gifts.

Christmas Homemade Personalised Mug and Hot Chocolate Gift Idea

Christmas Homemade Personalised Mug and Hot Chocolate Gift Idea

Christmas Homemade Personalised Mug and Hot Chocolate Gift Idea

Christmas Homemade Personalised Mug and Hot Chocolate Gift Idea

Christmas Homemade Personalised Mug and Hot Chocolate Gift Idea

Christmas Homemade Personalised Mug and Hot Chocolate Gift Idea

Christmas Homemade Personalised Mug and Hot Chocolate Gift Idea

To create the little bundles we used:

- Our homemade mugs
- Our homemade chocolate blocks
- Clear cellophane (similar to this)
- Christmas ribbon
- Mini marshmallows
- Candy canes
- Christmas string
- Plain labels

We started by filling the mugs with mini marshmallows for our family to enjoy with their hot chocolate blocks, which we'd already wrapped in the cellophane, tied with the Christmas string and then popped on top of the marshmallows. We added two candy canes to each as they are super cute and very Christmassy.

Then we had the task of cutting the cellophane to the right size to fit around the mug nicely. The first attempt didn't work so well but after the second we were on a roll gathering the cellophane around the top of the mug and fastening tightly with Christmas ribbon. I chose a gingerbread man one, I wonder why... We also then added a little label to let the receiver know what to do with their chocolate blocks.

Finally, our little homemade gifts were complete and we were really impressed with our crafty hands. I don't know about you but we think they look really professional and we're proud to give them to our family. In fact, we can't wait to see what they think.

Do you like? Will you be attempting something like this at Christmas?

If you have any crafty Christmas posts please feel free to link below so I can have a nosy.
SHARE:

Wednesday, 2 December 2015

A heartfelt cup of tea - Personalised Christmas craft idea

This Christmas myself and my friend, Kirsty, decided that we wanted to do a crafty project together that would result in some lovely Christmas presents for our family and friends. We searched Pinterest and came across a few ideas for creating special mugs and also homemade hot chocolate gifts. Our brains then got to work to decide what we needed to start this Christmas craft.

Personalised Homemade Mug Christmas craft idea


When we got down to it and went shopping we discovered that we really didn't need an awful lot to create something that would look brilliant. 

What you will need:

- White mugs (we bought ours from The Range)
- Sharpie oil-based paint markers in whatever colour you fancy (we got ours from Amazon)
- Letters: Either print a stencil in which case you'll need masking tape to stick it on, or buy letter stickers
- An oven
- Antibacterial wipes for mistakes

Optional - Christmas music and candy canes

Christmas crafty idea - Homemade Mugs

Christmas crafty idea - Homemade Mugs

Christmas crafty idea - Homemade Mugs

Christmas crafty idea - Homemade Mugs

Christmas crafty idea - Homemade Mugs

To make these mugs first, cut out your letters (if you printed them) and affix them to your mug using the masking tape if they are stickers just place them on. When you're happy with the placement start dotting around the letters making sure to go around the letter completely to ensure the letter will be visible when the stencil is pulled it away. Myself and Kirsty each took a different approach to these mugs. I was faster and all over, whilst Kirsty was slow and steady doing fewer dots.

Next, pull the letters away. If on any of your mugs the dots become a little smudged simply use an antibacterial wipe to clear away the mess and pen on anything else you need. When you are happy with your design put all mugs in the oven and turn it on to around 220°C keeping them in for an hour. It's important to put them in before the oven is turned on so that the mugs can warm up slowly. When the time has lapsed turn the oven off and leave the mugs to cool down before taking them out of the oven. 

Ours turned out brilliant and we were so pleased with how they looked. Hopefully, you will get the chance to make these for a gift, or even for yourself. They are super easy and look so good! 

We decided to make these mugs into a larger gift by adding little homemade chocolate blocks for people to enjoy hot chocolate in their new mugs. That post is coming tomorrow...
SHARE:

Wednesday, 28 October 2015

Pinterest inspired giveaway pumpkins!

This year I've taken Pinterest a little too seriously and started attempting crafts that are featured. You may have seen on my Instagram that I successfully made some jars covered in autumn leaves to put candles in and they looked great! So after that success, I thought it was time to try something Halloween themed.

I saw these cute little pumpkin giveaways and decided I had to try them. They had only two main parts, excluding the sweets, which is orange tissue paper and green electrical tape. You also need scissors, a pencil and something round to draw around. I chose a bowl but soon found that was too small...

pinterest inspired pumpkin sweet giveaways - Halloween Crafts

pinterest inspired pumpkin sweet giveaways - Halloween Crafts

pinterest inspired pumpkin sweet giveaways - Halloween Crafts

pinterest inspired pumpkin sweet giveaways - Halloween Crafts

pinterest inspired pumpkin sweet giveaways - Halloween Crafts

pinterest inspired pumpkin sweet giveaways - Halloween Crafts

pinterest inspired pumpkin sweet giveaways - Halloween Crafts

To make these little mites, first, lay your tissue paper out, use your circle and your pencil to draw as many circles as you can, then cut them all out! You need to choose your circle carefully. I decided on a bowl and it turned out I could only get three tiny sweets (a.k.a the little pumpkin choccies in the picture above) inside which was a bit lame. As I'd already cut out all my circles I continued on! What a trooper I am.

Get yourself two of your tissue paper circles, lay them on top of each other and place your sweets in the middle. Gather one of the circles around your sweets. This is easier if you place the circle on your hand and sort of cup the sweets as you gather the top. Give the top a little twist and then do the same with the second circle of paper, this time being a little bit neater. With this one try not to twist but to squeeze the top together so it looks more presentable. Then put a little bit of green tape around the top. If it doesn't look too much like a pumpkin shape then move the sweets around a little and squish the top down and give it a wiggle to get a better shape.

There you have it, some little pumpkins to give to the trick or treaters. If they don't impress the kids, maybe their parents will appreciate your effort.

Overall although my crafting produced tiny pumpkins I think they are super cute. I'm going to have to tell the children that come to the door to take a pumpkin AND another sweet. Well, I don't want to be too stingy!
SHARE:
© this Northerner.

This site uses cookies from Google to deliver its services - Click here for information.

Blogger Template Created by pipdig